Prerequisites: You’ll need an active Vapi account and a Tuner account to follow this guide.
Overview
Connecting your Vapi assistant to Tuner follows this order: gather credentials from Vapi, save your Vapi Private API key in Tuner Workspace Settings first, then create your agent.Add your Vapi API key in Tuner
Paste your Private key under Workspace Settings → API Keys & Integrations and save — before you create an agent.
No Webhook Configuration Needed: Tuner automatically handles the webhook setup for you. After your Vapi Private API key is saved and your agent is created with the correct Assistant ID, Tuner will configure everything in the background.
Step 1: Get Your Vapi API Key
Use a Private API Key from Vapi — not the Public key. The Public key is meant for client-side use; Tuner needs a Private key for secure server-side access.- Log in to the Vapi dashboard.
- Open API Keys using either path:
- Click your profile menu (top right) and choose Vapi API Keys, or
- Go directly to dashboard.vapi.ai/org/api-keys.
- Under Private API Keys, either copy an existing key or click to create a new one.
- Keep the key safe — you will paste it into Tuner Workspace Settings in Step 3.
Step 2: Get Your Vapi Assistant ID
- In the Vapi dashboard, open Assistants (for example dashboard.vapi.ai/assistants).
- Click the assistant you want to connect to Tuner.
- Copy the Assistant ID — it is a unique identifier (often shown on the assistant detail page and used in API calls).
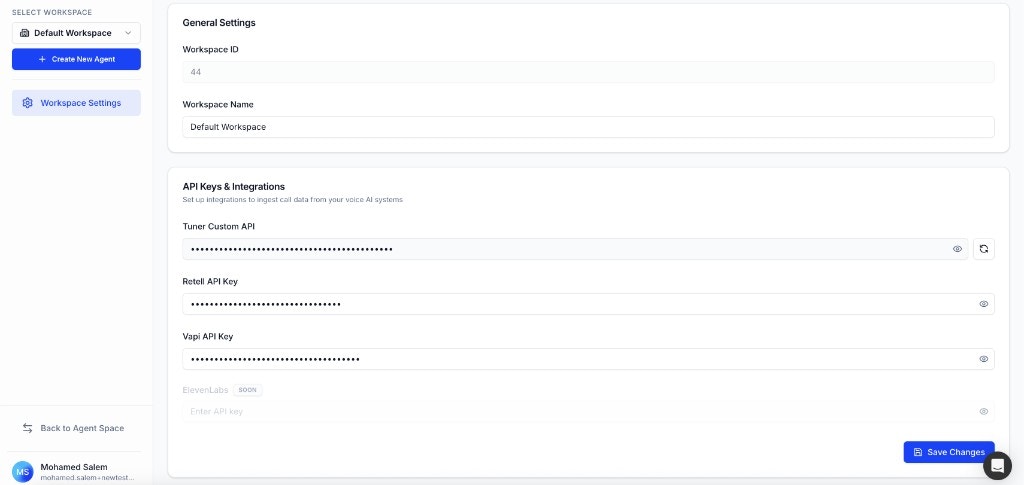
Step 3: Add your Vapi API key in Tuner (before creating an agent)
Do this before you click Add New Agent, so your workspace is authorized to talk to Vapi when you finish setup.- In Tuner, open Workspace Settings (gear icon in the sidebar).
- Under API Keys & Integrations, paste your Vapi Private API Key into the Vapi API Key field.
- Click Save Changes.
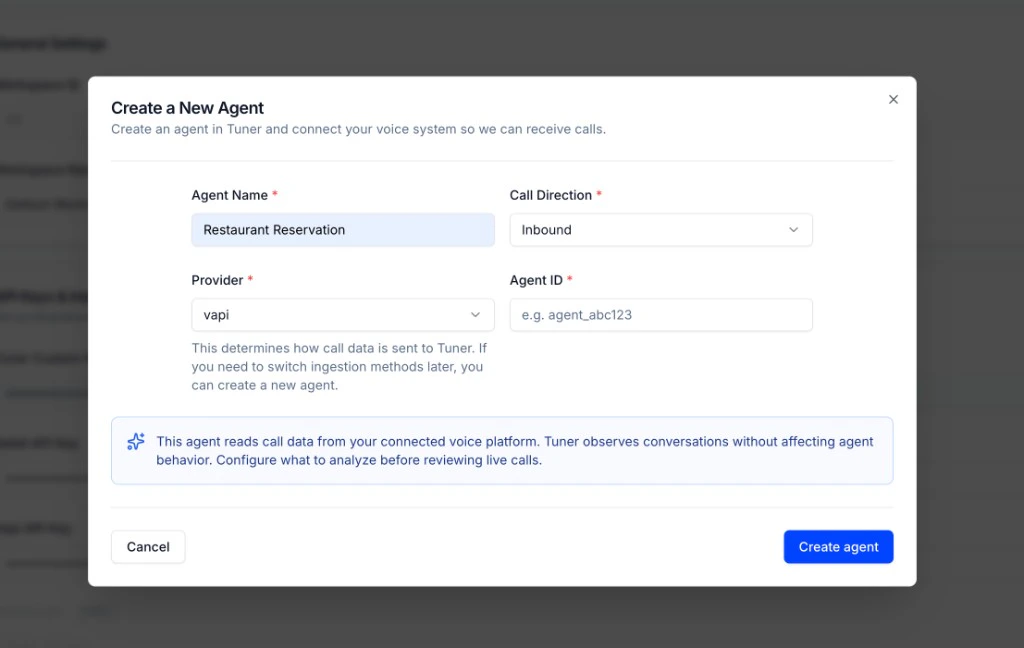
Step 4: Create your agent in Tuner
- Click the Select Agent dropdown in the sidebar and select Add New Agent.
-
In the Create a New Agent modal, fill in the required fields:
- Agent Name: A display name for this agent in Tuner.
- Call Direction: Inbound or Outbound, matching how this assistant is used.
- Provider: vapi — this tells Tuner how call data is ingested.
- Agent Remote ID: Paste the Assistant ID you copied from Vapi.
- Click Create agent.
Troubleshooting
Troubleshooting Common Issues
Troubleshooting Common Issues
🎉 Congratulations!
You’ve successfully connected your Vapi assistant to Tuner! Here’s what you’ve accomplished: ✅ Obtained your Vapi Private API Key and Assistant ID from Vapi ✅ Saved your Vapi API key in Tuner Workspace Settings first ✅ Created your agent in Tuner with the correct Assistant ID ✅ Tuner automatically configured the connectionWhat’s Next?
Your Vapi assistant is now connected. Future calls can be sent to Tuner for analysis.Developer Quick Start
Set up MCP or blank configuration and send your first call.
Configure via MCP
Use your IDE or chat app to generate outcomes, intents, evaluations, and alerts automatically.
How to Analyze Your First Call
A step-by-step guide to analyzing your first call.
Best Practices for Agent Monitoring
Learn how to effectively monitor your agent and catch issues early.