What Are Test Profiles?
A test profile is a named set of key-value fields that get injected into the simulated caller’s context at the start of a run. The simulation agent uses this data to behave like a specific type of customer — a new user who doesn’t know the product, an angry user on a repeated call, someone in a rush with a tight time window. Without a test profile, the simulation agent has no caller-specific context. With one, it can personalize the conversation exactly as a real customer would: referencing their name, their issue, their reason for calling. Profile data is snapshotted at run time — editing or deleting a profile after a run has no effect on results from that run. Profiles are scoped to the agent — profiles created for one agent are not visible to other agents in your workspace.The Test Profiles Page
Navigate to Simulations → Test Profiles in the sidebar to manage profiles for your agent.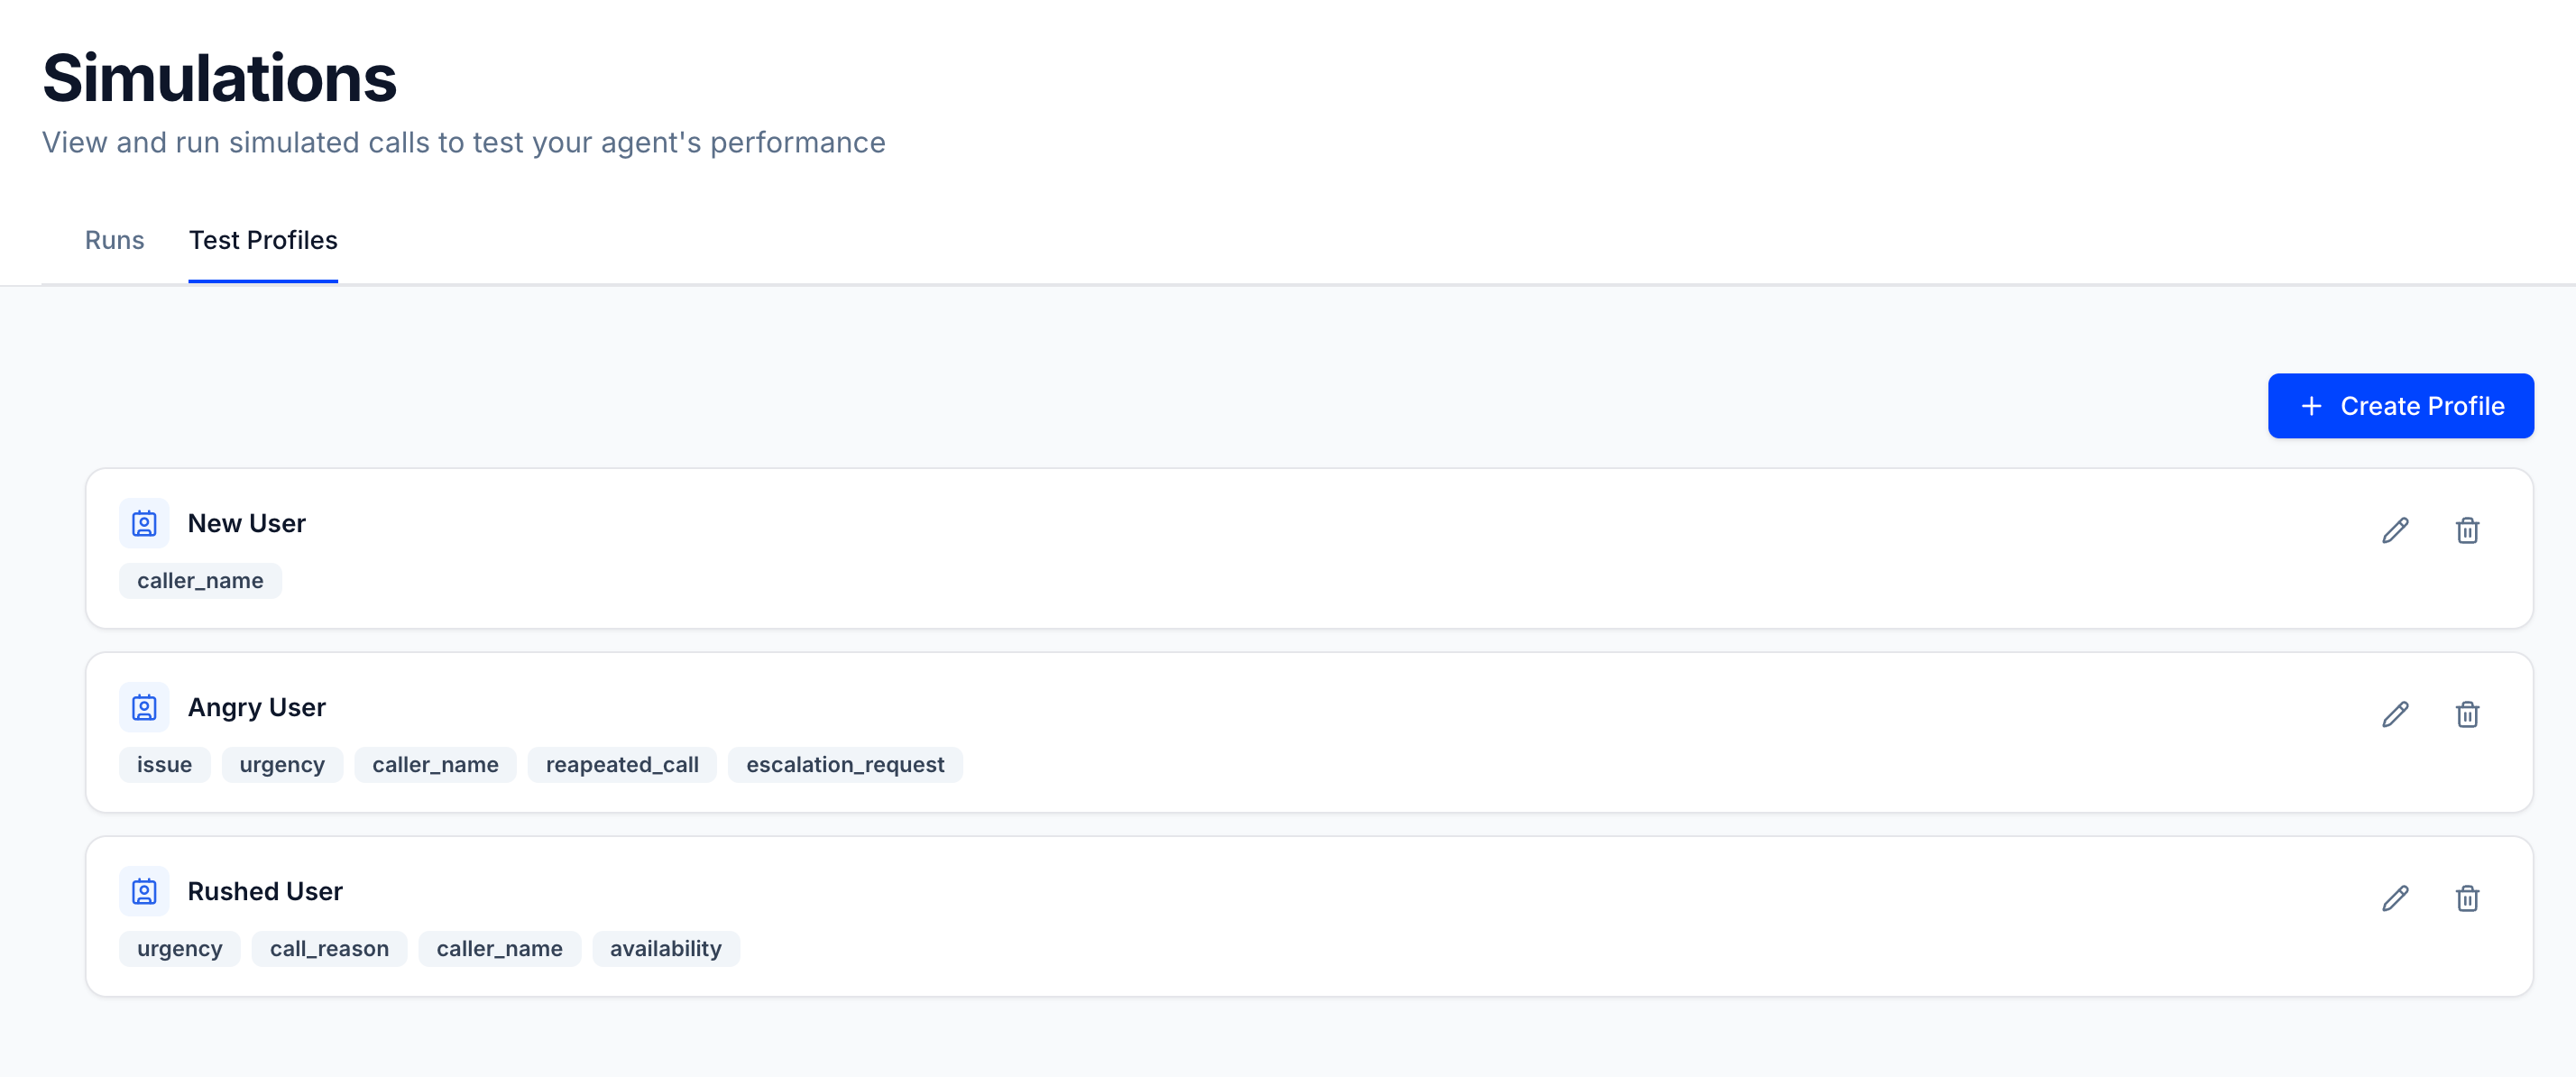
- Profile name — what you’ll see when selecting it in the Run Simulation dialog
- Field tags — all key names defined in the profile at a glance (e.g.
caller_name,issue,urgency)
Creating a Profile
Click + Create Profile in the top-right corner of the Test Profiles page.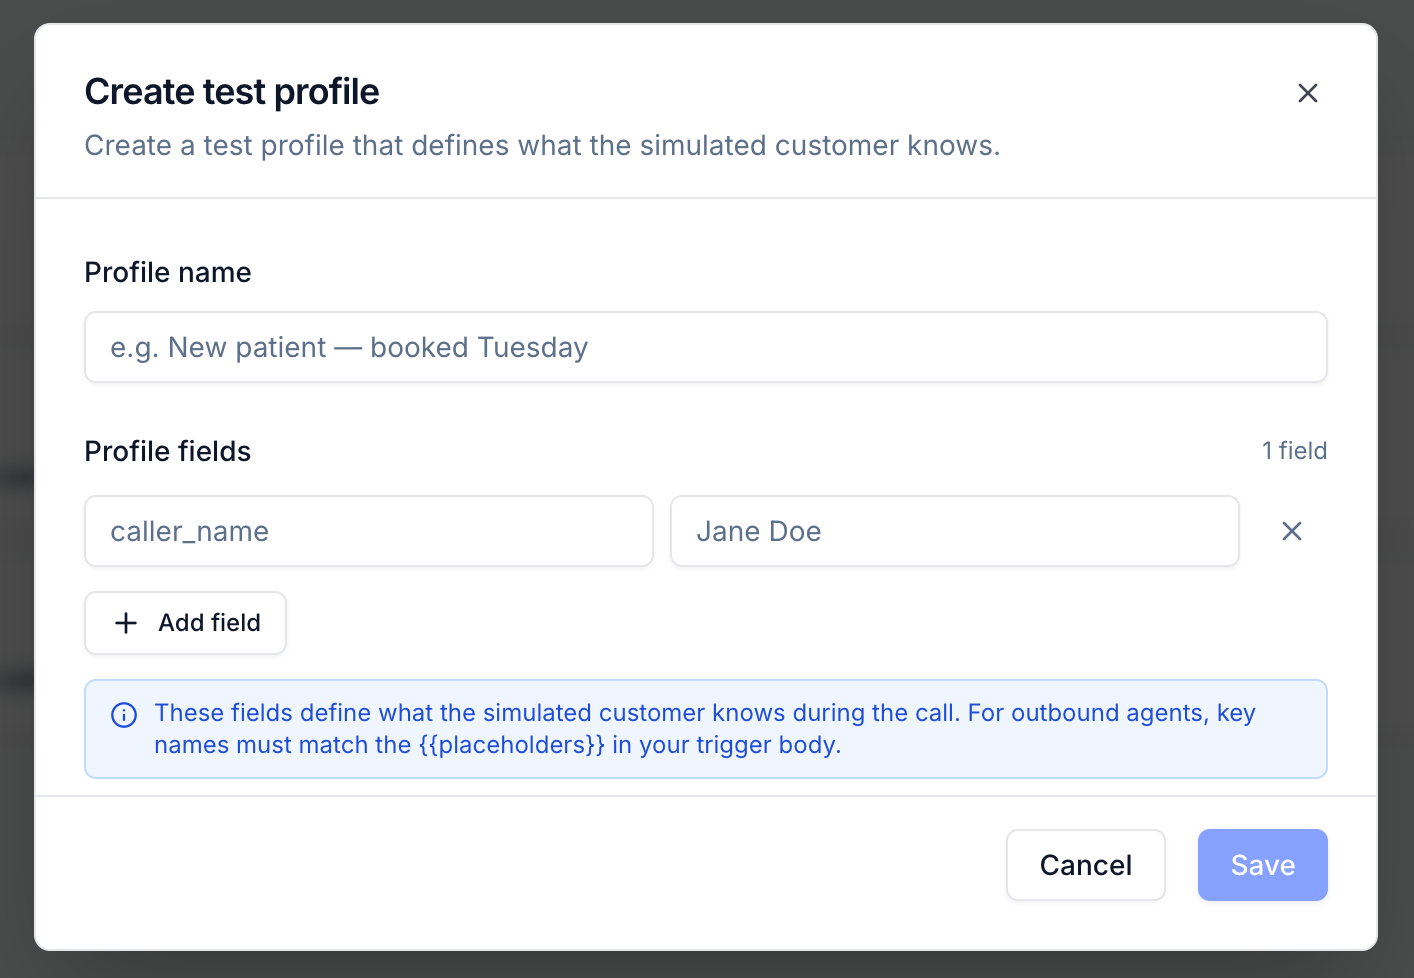
Name the profile
Give the profile a descriptive name that identifies the scenario — for example, Angry User, New Patient — First Visit, or Rushed Caller.
Add fields
Click + Add field to add a key-value pair. The key is the variable name (e.g.
caller_name, issue, urgency) and the value is the data the simulated caller will know (e.g. Jane Doe, billing error, high).Fields are plain strings — one level deep, no nested objects. Add as many fields as the scenario requires.For outbound agents, field key names must match the
{{placeholders}} in your trigger body exactly. The simulation engine substitutes them before sending the trigger request.Selecting a Profile for a Run
When you open Run Simulation, a Test profile row appears in the configuration panel alongside the Simulation Mix, language, and target settings.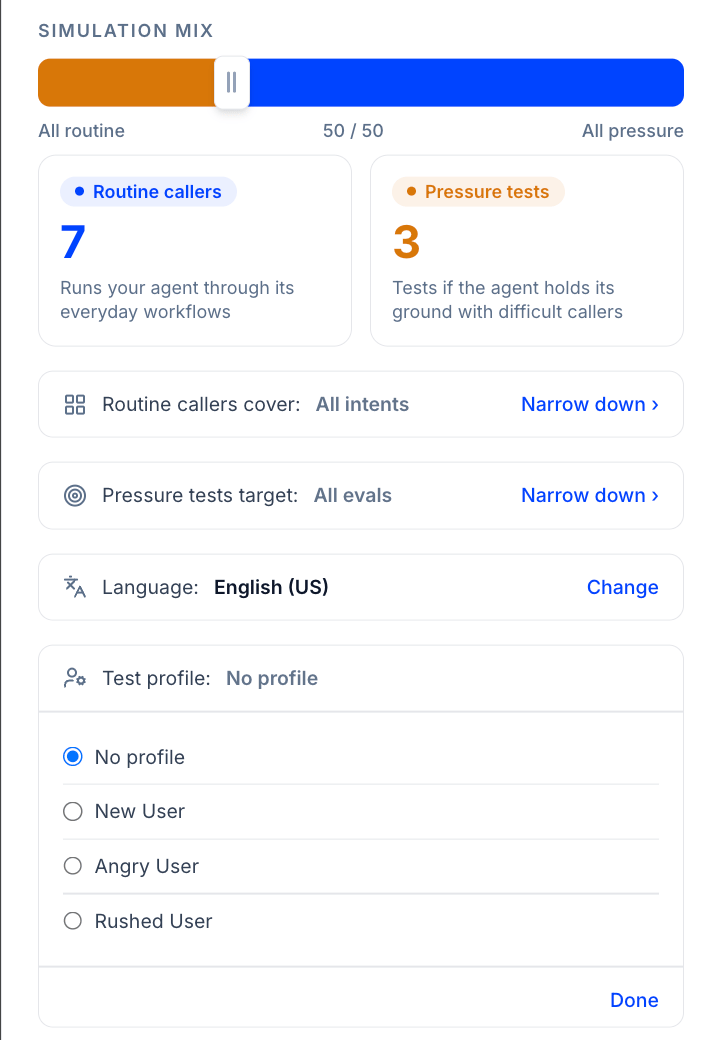
- No profile — the simulation agent has no caller-specific context (default)
- Any named profile from your library — the simulation agent is given those fields as context before the call starts
Editing a Profile
Click the pencil icon on any profile card to open the edit view. You can:- Rename the profile
- Add new fields
- Edit existing key names or values
- Remove individual fields
Deleting a Profile
Click the trash icon on a profile card. A confirmation step is required before the profile is permanently removed. Deleting a profile does not affect any past runs that used it — those results retain their snapshotted profile data.Next Steps
Introduction to Call Simulation
How the Simulation Mix, Routine Callers, and Pressure Tests work together.
Inbound Simulation Setup
Connect your inbound agent to start running simulations.