

How to create an alert
1
Navigate to the Alerts Tab
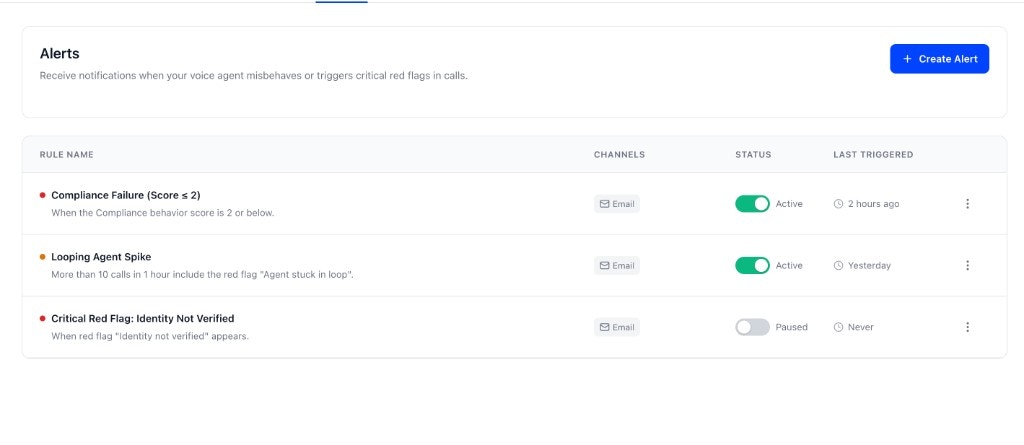
From the sidebar, click on Agent Settings, then select the Alerts tab. Here you’ll see a list of your existing alerts along with their status and last triggered time.
2
Click Create Alert
Click the + Create Alert button in the top-right corner to open the alert configuration modal.
3
Fill in Basic Details
- Alert Name: Give your alert a descriptive name (e.g., “High Failure Rate Alert”).
- Description (optional): Add a note for your team explaining what this alert monitors.
- Severity: Choose from Info, Warning, or Critical based on the urgency level.
4
Define the Trigger Condition
Set the condition that will trigger the alert:
- Select Field: Choose what to monitor (e.g., Hallucination, High Latency, Intent Missed, Identity not verified).
- Operator: Select how to compare (equals, not equals).
- Click + Add condition to add multiple conditions if needed.
5
Set the Threshold
Define when the alert should fire:
- Trigger when: Set the number of matching calls (e.g., 10 calls).
- Time window: Choose the time period (5 minutes, 15 minutes, 1 hour, or 24 hours).
6
Configure Notification Channels
Choose where you want to receive alerts: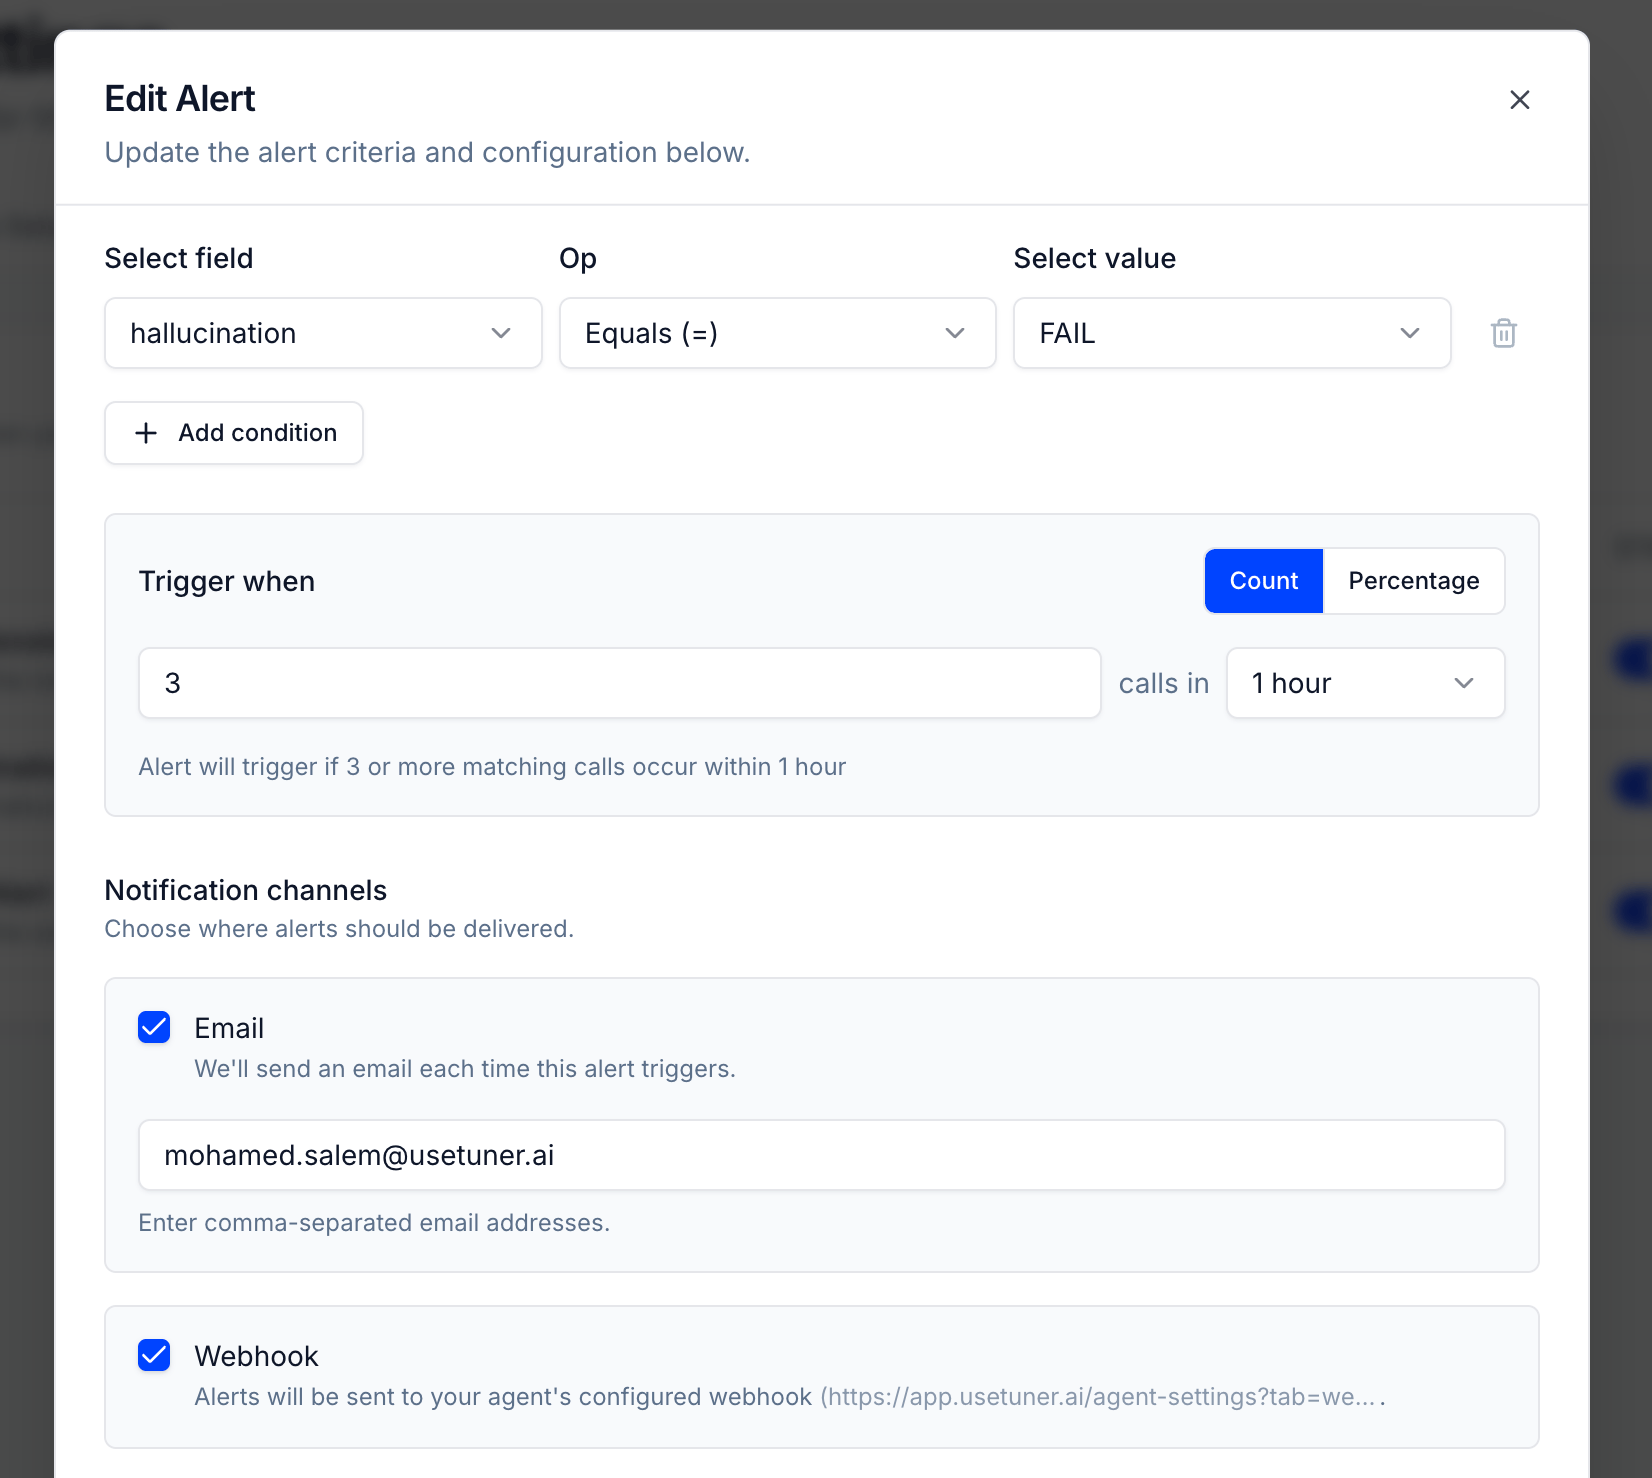
- Email: Enter the email addresses that should receive notifications (comma-separated for multiple recipients).
- Webhook: Send an
alert.firedevent to your agent’s webhook — see Webhooks for the payload and setup. - Slack: Coming soon.
7
Save the Alert
Click Save alert to activate your new alert. It will appear in the alerts list with an “Active” status.
Example alerts
Common configurations to get you started:High Hallucination Rate
High Hallucination Rate
Alert Name: Hallucination Spike
Severity: Critical
Condition: Hallucination equals true
Threshold: 5 calls in 1 hourThis alert notifies you when your agent is providing inaccurate information frequently.
Severity: Critical
Condition: Hallucination equals true
Threshold: 5 calls in 1 hourThis alert notifies you when your agent is providing inaccurate information frequently.
Identity Verification Failures
Identity Verification Failures
Alert Name: Identity Not Verified
Severity: Warning
Condition: Identity not verified equals true
Threshold: 10 calls in 1 hourUseful for agents that require identity verification before proceeding.
Severity: Warning
Condition: Identity not verified equals true
Threshold: 10 calls in 1 hourUseful for agents that require identity verification before proceeding.
High Latency Issues
High Latency Issues
Alert Name: Slow Response Times
Severity: Warning
Condition: High Latency equals true
Threshold: 15 calls in 1 hourAlerts you when your agent is experiencing performance issues.
Severity: Warning
Condition: High Latency equals true
Threshold: 15 calls in 1 hourAlerts you when your agent is experiencing performance issues.
Best practices
Start with high-signal alerts
Alert on clear, critical problems only. Too many alerts and the important ones get ignored.
Set meaningful thresholds
Too low creates noise; too high misses issues. Tune them after you see real volume.
Route by urgency
Send critical alerts to a webhook wired into a channel your team watches. Email is fine for the rest.
Review regularly
Revisit your alerts as the agent changes — conditions that mattered last quarter may not now.
Next steps
Red flags
The rules that most alert conditions are built on.
Webhooks
The
alert.fired payload and how to set up your endpoint.